Technical Parameter Configuration (Public Key Setup)
Technical Parameter Configuration (Public Key Setup)
This document explains how to configure your merchant public key, IP whitelist, and callback notification URL in the merchant dashboard to complete the essential setup before integration.
Generate Key Pair
Before configuring the public key, ensure you have generated an RSA key pair (2048-bit). You can generate one using the following methods:
- Use the online key generator tool provided by PayCools (keys are generated locally in the browser and never uploaded to the server);
- Generate one yourself using JDK, OpenSSL, or other tools.
Navigate to Configuration Page
Log in to the merchant dashboard and navigate to the API key configuration page via:
Configuration entry: Developer → App Details → API Key
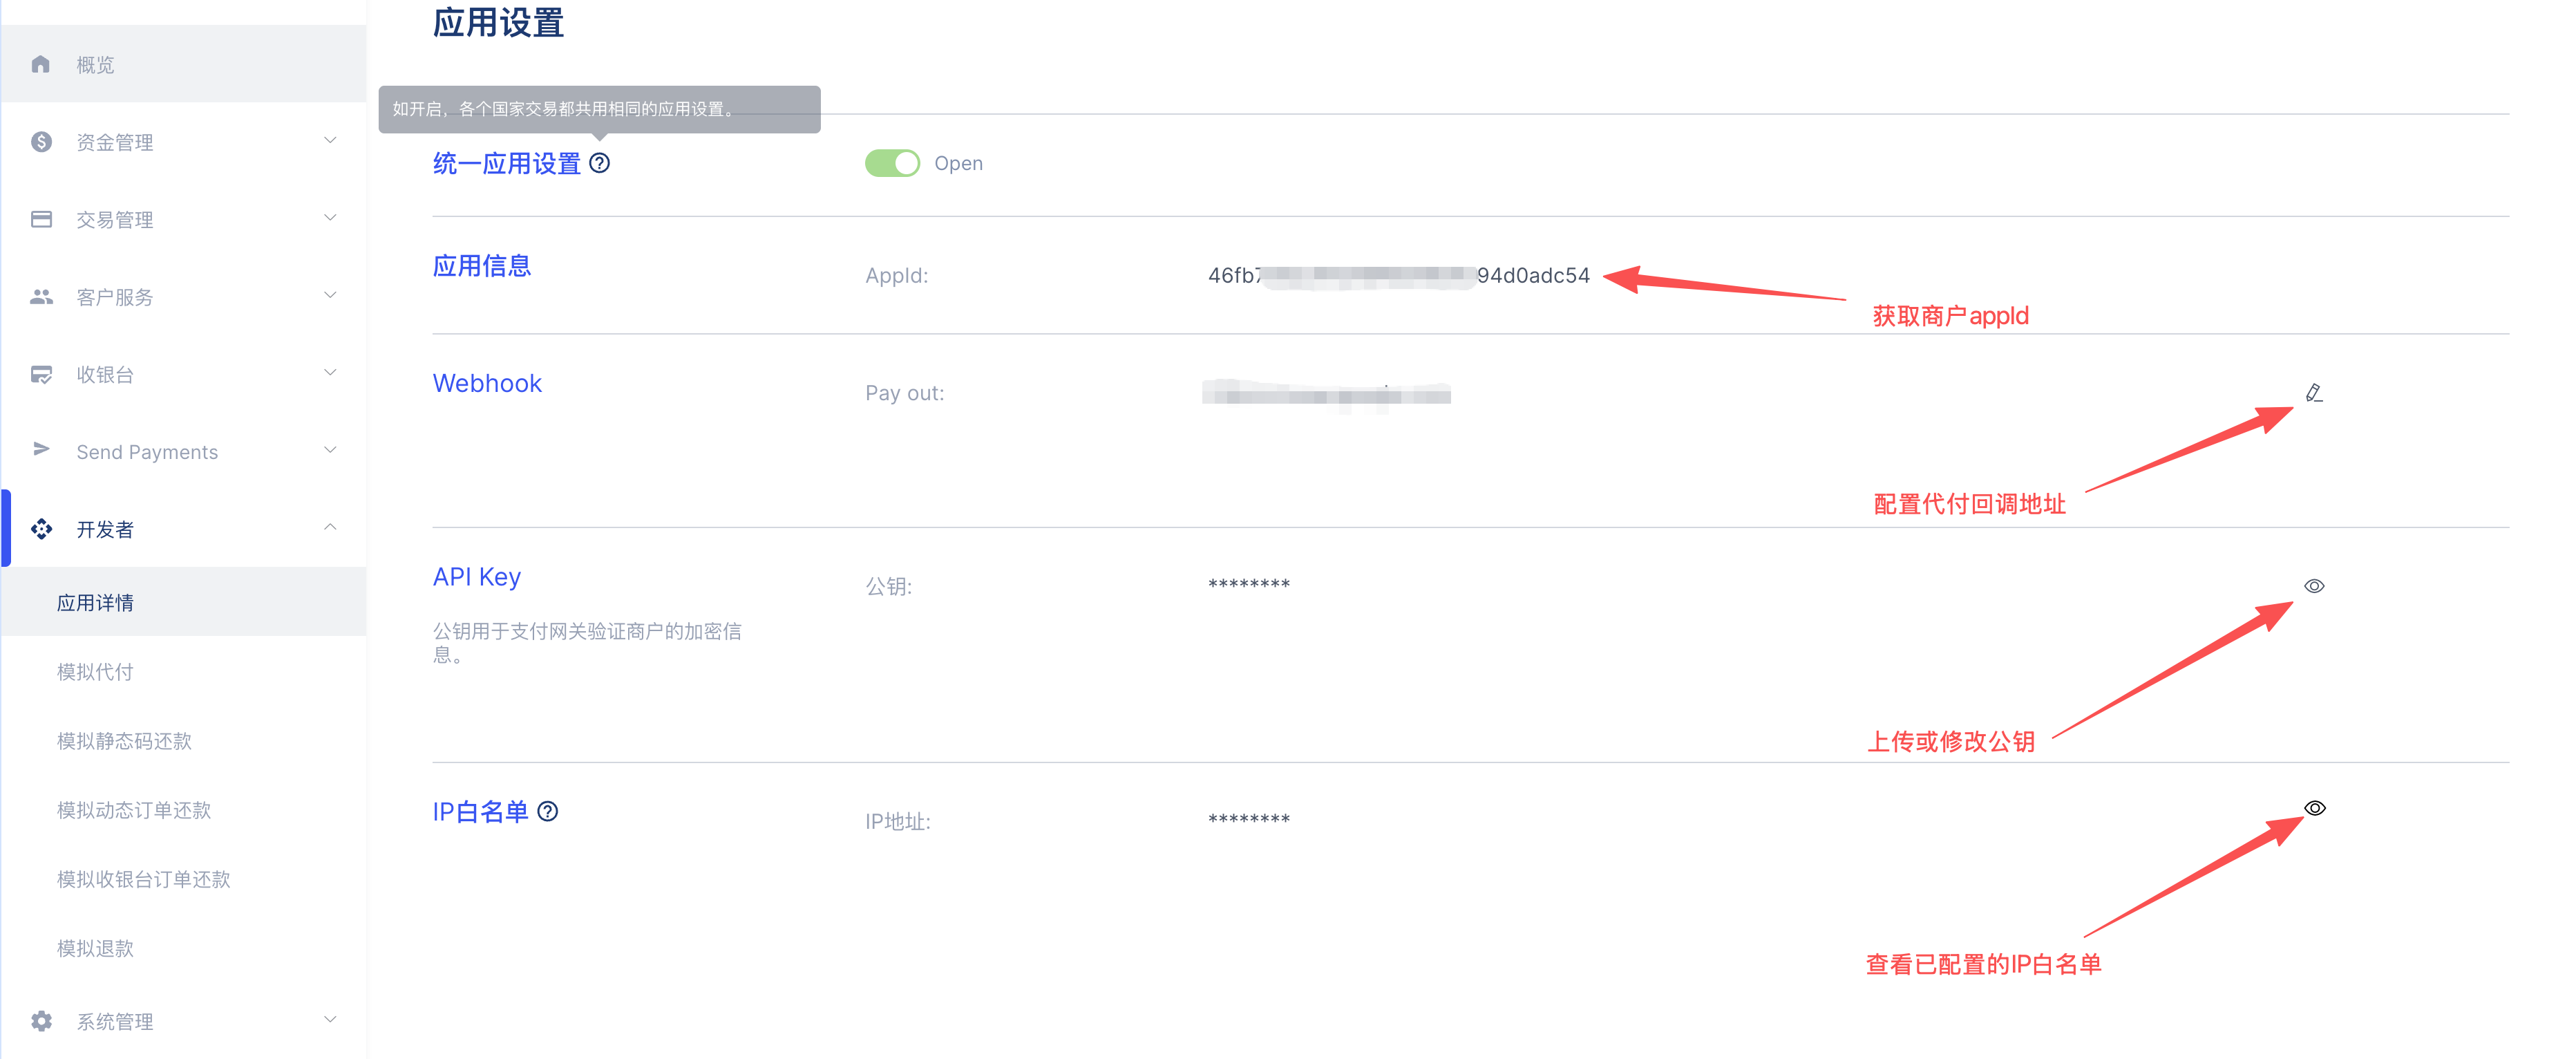
Edit Public Key
On the API Key page, click Edit Public Key and paste your generated merchant public key into the input field. When uploading, remove the -----BEGIN PUBLIC KEY----- and -----END PUBLIC KEY----- markers, as well as any line breaks and spaces — only keep the Base64-encoded content.
For the platform public key, please refer to: Environment Information - Platform Public Key
Configure IP Whitelist
On the same page, you can configure the IP Whitelist. Once enabled, the platform will only accept API requests from whitelisted IP addresses, effectively preventing unauthorized access and enhancing account security.
- Supports single IP addresses or CIDR ranges (e.g.,
192.168.1.0/24); - Multiple rules should be separated by line breaks;
- For the test environment, it is recommended to skip the whitelist for easier debugging; for production, enabling it is strongly recommended.
Configure Disbursement Notification URL
On the API Key page, you can also configure the Disbursement Notification URL (Notify URL). The platform will send asynchronous notifications to this URL when the disbursement transaction status changes, ensuring your system receives timely updates.
Get AppID
After completing the above configuration, you can find your AppID on the App Details page. The AppID is a required parameter for calling PayCools APIs — please configure it on your server.